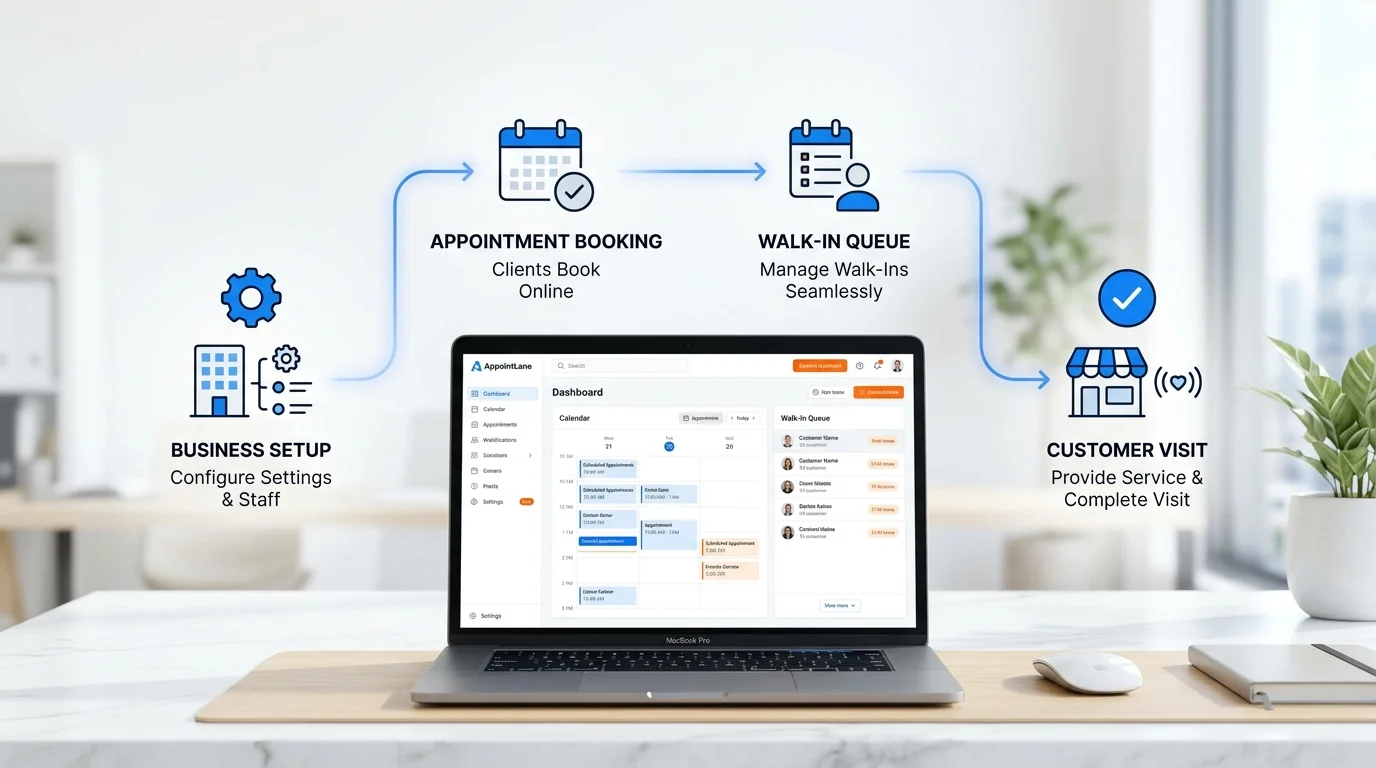
This guide provides a practical, step-by-step walkthrough for business owners and operations managers who want to learn how to get started with AppointLane. AppointLane is an online appointment booking and queue management system designed to help professional service businesses manage scheduled visits and same-day walk-ins from a single workspace.
By the end of this guide, you will know exactly how to configure your business, set up services, manage staff availability, and launch a seamless customer booking experience.
Before You Get Started With AppointLane
A smooth AppointLane setup begins with gathering the right information. Having these details ready will make your appointment booking system setup much faster and more accurate.
You do not need to have every detail finalized, but having a clear idea of the following will help:
- Business name, address, and contact information
- List of services offered and their estimated durations
- Staff members who will be providing the services
- Standard operating hours and any known exceptions (e.g., lunch breaks, holidays)
- Booking rules (e.g., how much advance notice is required)
- Walk-in queue requirements (e.g., daily ticket limits)
- Customer communication preferences (e.g., email confirmations)
Pre-setup checklist
- Business details (official business name, locations, time zone)
- Services and packages offered with standard durations
- Staff members and their qualified roles
- Standard operating hours and holiday schedules
- Booking rules and approval preferences
- Walk-in queue requirements and daily capacity limits
- Customer notification and communication settings
Step 1: Create Your AppointLane Workspace
The first step in learning how to use AppointLane is creating your account. AppointLane offers a 14-day free trial with full access to its features, and no credit card is required to begin. You can also start with the Forever Free plan if you are a solo practitioner testing the waters.
- Navigate to the AppointLane website and select the option to start a free trial or sign up for a free account.
- Enter your primary business email and create a secure password.
- Follow the initial prompts to name your workspace and select your primary time zone.
- Verify your email address if prompted.
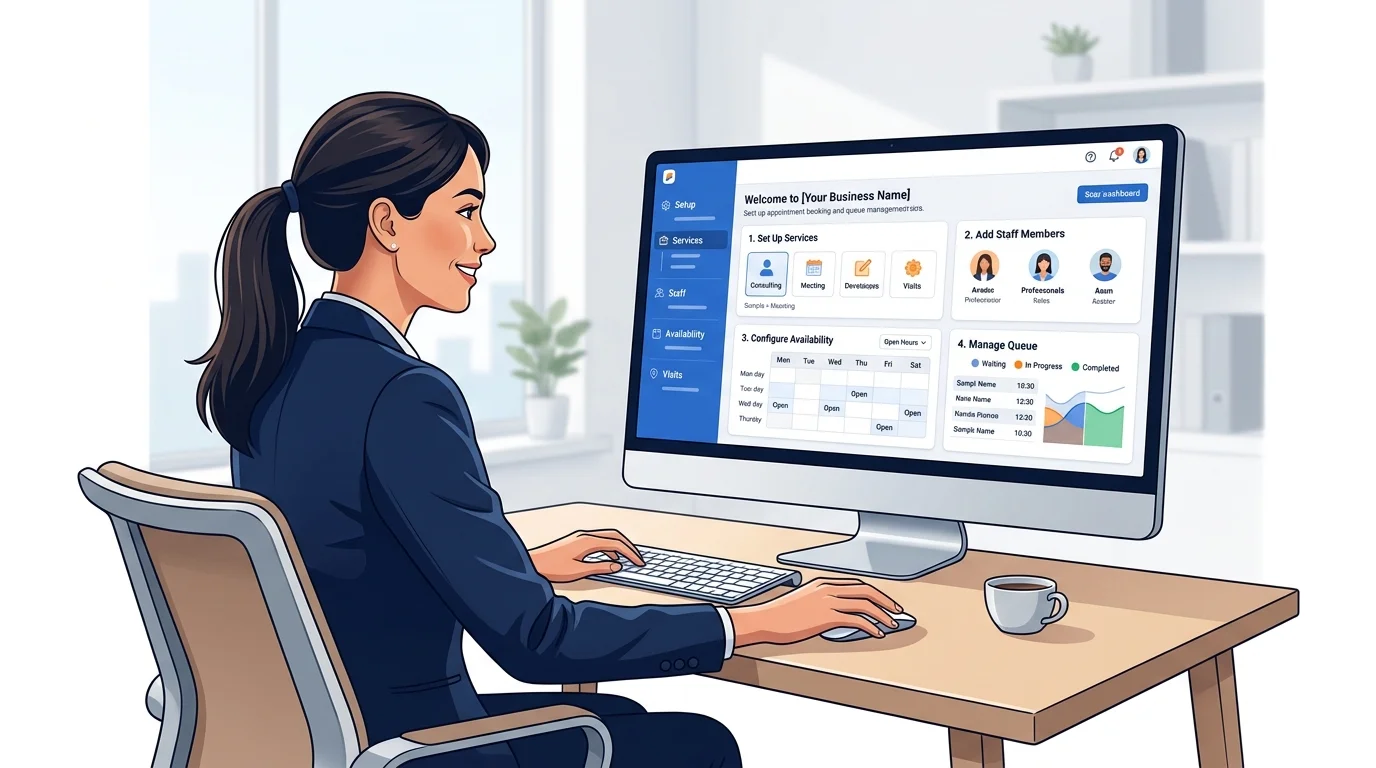
Once logged in, you will be greeted by the main dashboard. This is your central hub for managing all AppointLane software operations.
Step 2: Add Your Business Information
Accurate business information is the foundation of a reliable customer booking system. This data ensures that customers know exactly where they are going and how to contact you if needed.
In your workspace settings, configure the following:
- Business Name: The official name customers will see on their booking confirmations and notifications.
- Location(s): The physical address or virtual meeting details where services are rendered. AppointLane supports multi-location management on higher-tier plans.
- Operating Hours: Your standard weekly opening and closing times.
These details automatically populate your public-facing pages, creating a professional and trustworthy booking experience.
Step 3: Add Your Services
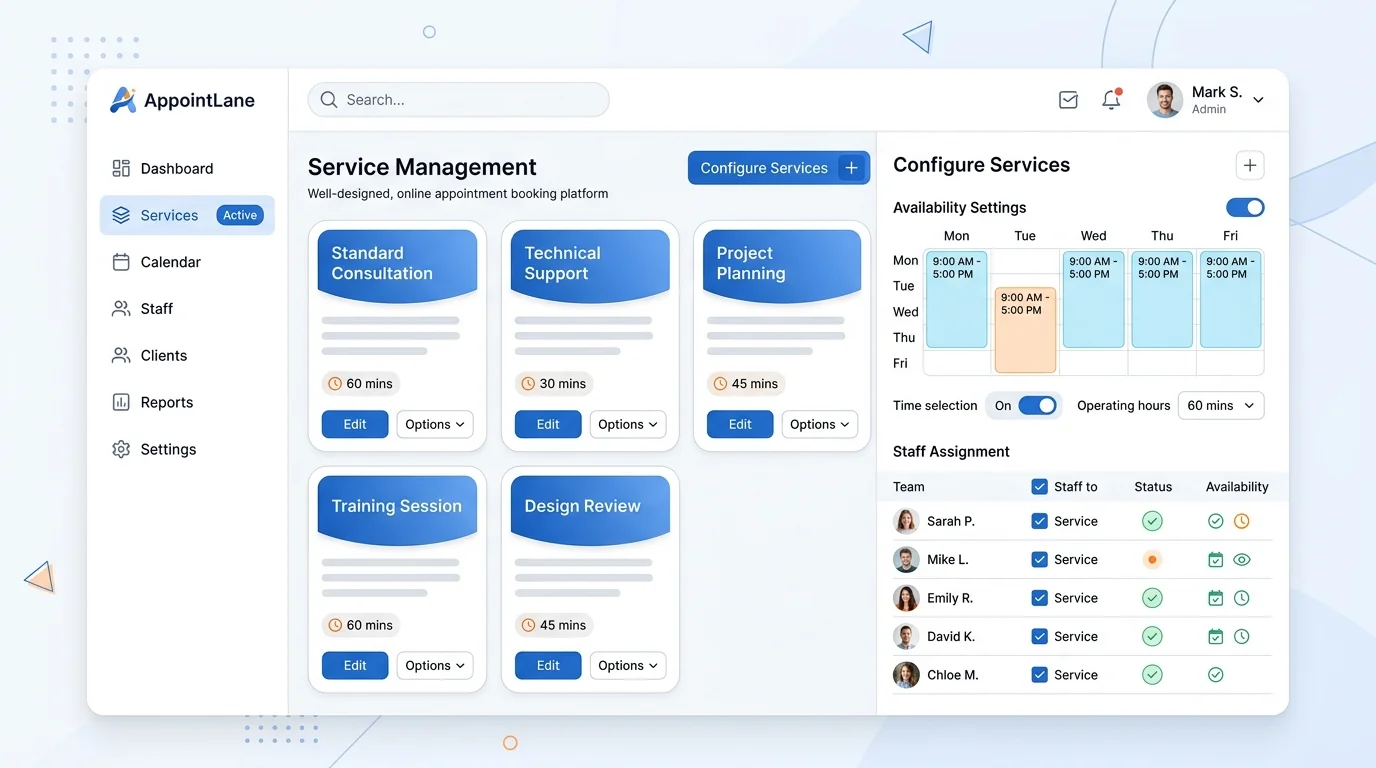
Your services dictate what customers can actually book. When configuring your AppointLane appointment booking, think about the specific offerings your business provides.
For each service, you can define:
- Service Name and Description: Clear, jargon-free titles (e.g., "Initial Legal Consultation" instead of just "Meeting").
- Duration: How long the service takes, which AppointLane uses to calculate available time slots.
- Buffer Time: Extra time added before or after an appointment for cleanup, room turnover, or administrative tasks.
- Eligible Staff: Which team members are qualified to perform this specific service.
Step 4: Set Up Staff and Availability
A robust AppointLane guide must emphasize the importance of accurate availability. If your system thinks a staff member is available when they are not, it leads to double-bookings and frustrated customers.
For each staff member, configure:
- Working Hours: Their specific weekly schedule, which may differ from the overall business hours.
- Service Assignments: Link the staff member only to the services they are trained to provide.
- Exceptions: Add specific dates for vacations, training days, or modified hours.
AppointLane calculates open times by cross-referencing weekly availability, date-specific exceptions, minimum notice periods, and existing capacity. This ensures that the same time slot cannot be promised to two different customers.
Step 5: Set Up Online Appointment Booking
Now it is time to configure the online appointment booking setup for your customers. AppointLane turns your business rules into a clear, public booking journey.
Key configurations include:
- Approval Method: Choose between automatic booking (instant confirmation when rules are met) or manual approval (requests stay pending until a staff member reviews them).
- Booking Horizon: How far in advance customers can book (e.g., up to 30 days).
- Minimum Notice: The minimum time required before a booking can be made (e.g., at least 2 hours in advance).
The customer booking journey
- Customer visits your booking page on desktop or mobile.
- Selects their preferred location and service.
- Views valid, real-time availability calculated from staff schedules.
- Enters contact details and any necessary intake information.
- Receives an instant confirmation or review notice alongside a secure self-service link.
Customers can use this secure link to review, reschedule, or cancel their appointment without needing to create an AppointLane account.

Step 6: Set Up Walk-In Queue Management
Not all customers book in advance. AppointLane queue management allows you to handle same-day walk-ins fairly and efficiently, without disrupting your scheduled appointments.
To set up your walk-in workflow:
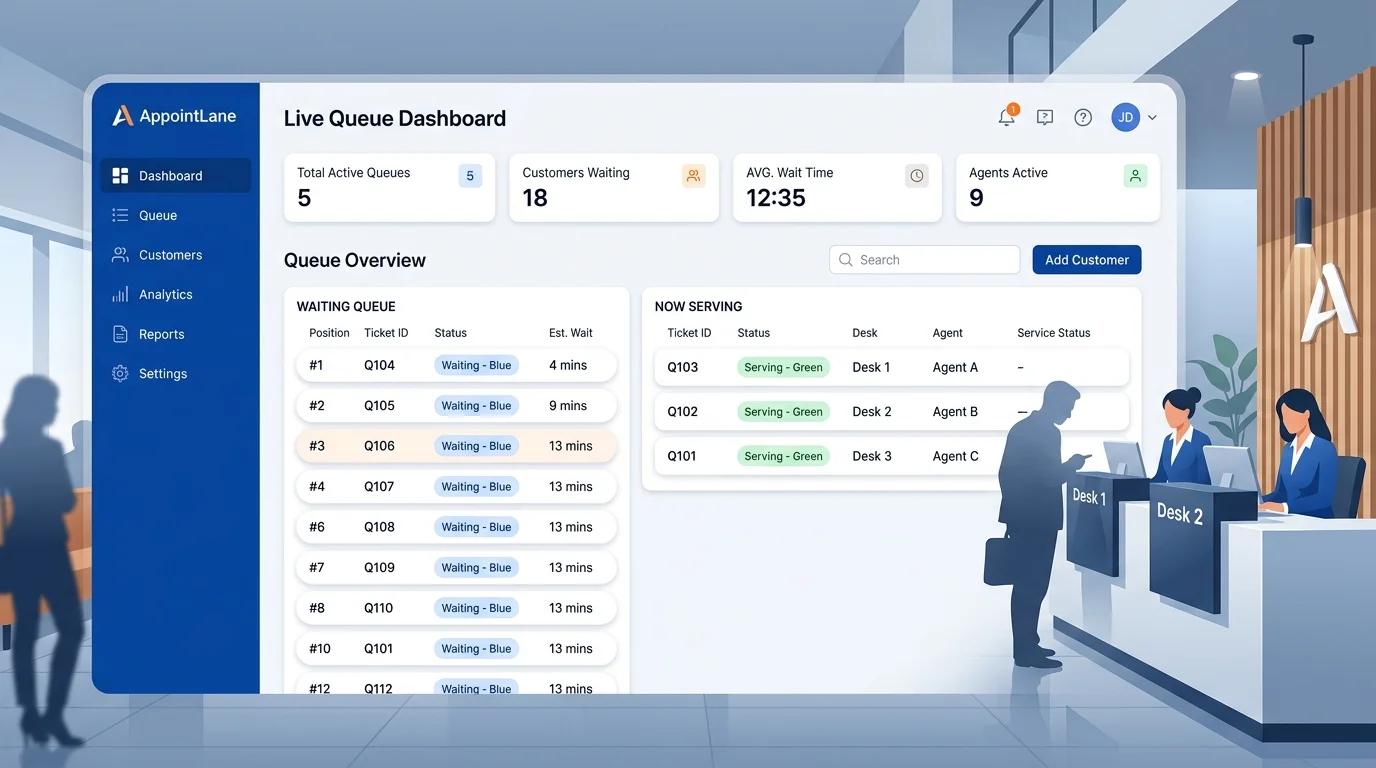
- Open a Queue: An authorized operator can open a live queue for a specific location and service for the day.
- Customer Check-In: Customers can join the queue via a public link, a QR code displayed at your reception, or be added manually by front-desk staff.
- Mobile Tickets: Upon joining, the customer receives a secure mobile link showing their position in line, the number of people ahead, and an explicitly labeled wait estimate.
- Staff Actions: Staff can view the queue, call the next customer, begin service, complete the visit, or record a reason if a ticket is skipped or canceled.
Step 7: Connect Appointments and Walk-Ins
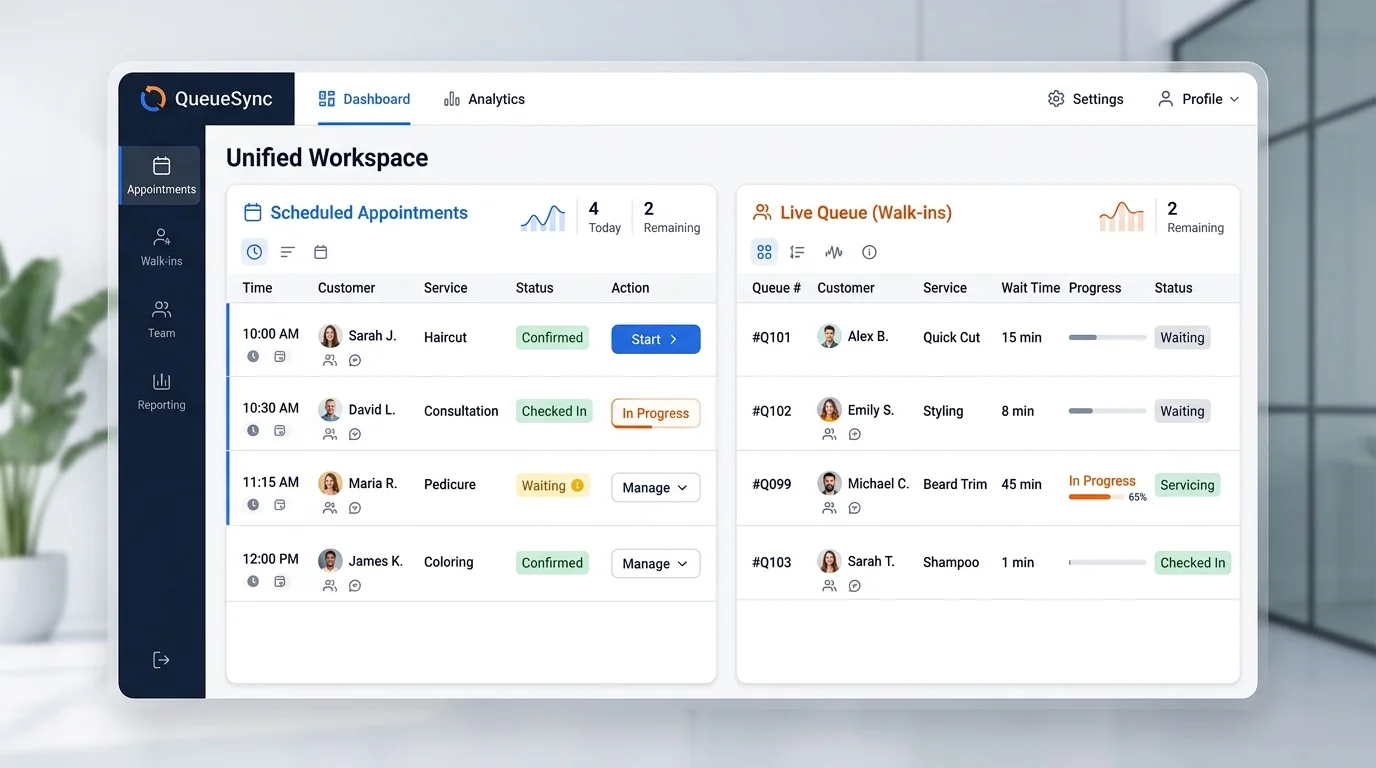
One of the most powerful aspects of the AppointLane booking system is its ability to bring scheduled appointments and walk-in customers into one unified operational workflow.
Instead of juggling a paper sign-in sheet and a digital calendar, your team gets a combined daily operations view. This allows staff to see:
- Who has a reserved appointment and when they are due to arrive.
- Who is currently waiting in the live walk-in queue and how long they have been waiting.
Workflow comparison
- Appointment: Customer books online → Arrives at scheduled time → Receives service.
- Walk-in: Customer arrives → Joins queue via QR code or desk → Receives mobile wait updates → Called for service.
Managing both streams together helps your team respond to delays and arrivals dynamically without erasing the difference between a reserved promise and a same-day place in line (explore our in-depth operational comparison on appointments vs walk-ins).
Step 8: Configure Customer Notifications
Timely communication helps reduce appointment no-shows and keeps walk-in customers patient. AppointLane supports automated, configurable notifications to keep everyone informed.
Ensure you configure:
- Booking Confirmations: Sent immediately after a successful booking or manual approval.
- Appointment Reminders: Operational reminders sent before the visit, including a secure route for the customer to review or change their appointment.
- Queue Updates: Notifications informing walk-in customers of their current status or if their estimated wait time changes significantly.
- Cancellation and Rescheduling Alerts: Updates sent to staff when a customer modifies their booking, freeing up capacity for cancellation waitlists.
Step 9: Configure Payments, Intake and Documents
Depending on your industry, you may need to collect information or funds before the visit. AppointLane allows you to layer these optional workflows into your setup.
- Client Intake & Forms: Request necessary information or document uploads before the appointment begins (see our client onboarding checklist).
- Payments: Connect supported payment providers to collect deposits or full payments at the time of booking (learn about setting a tattoo appointment deposit policy).
- Cancellation Policies: Configure rules around refunds or cancellations to protect your business revenue (use our salon appointment cancellation policy template).
Note: You do not have to enable all of these. A simple consulting firm might only need a booking confirmation, while a medical clinic might require intake forms and a copay deposit.
Step 10: Test Your AppointLane Setup
Before making your system live, it is critical to test the AppointLane tutorial workflow from the customer's perspective.
Pre-launch testing checklist
- Book a test appointment as a customer on desktop and mobile
- Verify the appointment confirmation email is received promptly
- Test customer self-service rescheduling and cancellation links
- Confirm staff availability and buffer times reflect correctly on the public calendar
- Simulate a walk-in customer joining the queue via QR code
- Check that the staff dashboard updates the queue status in real time
- Verify notification delivery across email and SMS
- Test the payment or intake workflow, if enabled
- Review the booking page on a mobile device for usability and speed
Testing ensures that your walk-in queue management setup and booking rules function exactly as intended before real customers rely on them.
Step 11: Invite Customers to Book or Join Your Queue
Once tested, it is time to introduce the system to your clients. You can share your new AppointLane booking system through several practical channels:
- Website Integration: Add a prominent "Book Now" or "Join Queue" button to your business website.
- QR Codes: Print and display AppointLane QR codes at your reception desk, on business cards, or in window signage for easy walk-in check-in. Explore our breakdown of virtual queues for service businesses.
- Email Signatures: Include your booking link in staff email signatures.
- Social Media: Share your booking page link on your business's social media profiles and Google Business listing.
- Direct Communication: Send the booking link via email or text to existing clients when scheduling their next visit.
Frequently Asked Questions
1. How do I get started with AppointLane?
You can get started by visiting the AppointLane website and signing up for a 14-day free trial or a Forever Free account. From there, you will configure your business details, services, staff, and availability.
2. Is AppointLane easy to set up?
Yes. The platform is designed with a logical, step-by-step configuration process. If you have your business hours, service durations, and staff details ready, you can complete the core setup quickly.
3. What do I need before setting up AppointLane?
You should have your business name, address, list of services with durations, staff schedules, and basic booking rules (like minimum notice periods) ready before you begin.
4. Can I manage appointments and walk-ins together?
Yes. AppointLane provides a combined daily operations view that displays both scheduled appointments and the live walk-in queue side-by-side, helping staff manage both streams without confusion.
5. Do customers need to install an app?
No. Customers can book appointments, manage their bookings, and check their live queue status entirely through a standard web browser on their smartphone or computer.
6. Can I add multiple staff?
Yes. Depending on your plan, you can add multiple staff logins, assign them to specific services, and configure individual working hours and exceptions.
7. Can I manage multiple locations?
Yes. AppointLane supports multi-location management, allowing you to configure distinct services, staff, and queues for different physical addresses (available on Business and Enterprise plans).
8. Can customers book appointments online?
Yes. You can publish a public booking page where customers can select a service, view real-time availability, and confirm their appointment instantly or via manual approval.
9. Can I manage walk-in queues with AppointLane?
Yes. You can run a live walk-in queue, provide customers with secure mobile links showing their position and wait estimates, and allow staff to manage the queue from a central dashboard.
10. Does AppointLane offer a free trial?
Yes. AppointLane offers a 14-day free trial with full access to its features, and no credit card is required to start. A Forever Free plan is also available for solo practices.
Final Thoughts
Getting started with AppointLane begins with setting up your business, services, and availability. From there, you can configure online appointment booking, walk-in queues, and customer communication to match the exact way your business operates. By following this step-by-step guide, you can eliminate scheduling chaos and provide a seamless experience for both your staff and your customers.
Ready to simplify your customer visits? Review our subscription plans and pricing or start your 14-day free trial today.